Picture this: you're running late, hop into your car, turn the key... and nothing. Just a frustrating silence. It's a scenario that can instantly derail your day. While many issues can cause a car to refuse to start, a blown starter fuse is a common culprit and thankfully, often a relatively simple fix.
That feeling of helplessness when your car won't start is something most drivers have experienced. The sinking sensation of realizing your carefully planned schedule is now in jeopardy. The frustration of not knowing exactly what's wrong and potentially facing an expensive mechanic's bill. The anxiety of being stranded, especially if you're in an unfamiliar or inconvenient location. These are the situations we all dread.
This guide aims to empower you to diagnose and replace a blown starter fuse yourself, saving you time, money, and a whole lot of stress. We'll walk you through the process step-by-step, from identifying the fuse box to selecting the right replacement fuse. Let's get your car back on the road!
In summary, this guide covers the identification and replacement of a blown starter fuse. We'll delve into fuse box location, fuse identification, the replacement process, and troubleshooting tips. Key terms you'll encounter include: starter fuse, fuse box, multimeter, amperage, and automotive electrical systems.
Understanding the Starter Fuse
The target of this section is to provide a comprehensive understanding of the starter fuse and its role in your vehicle's starting system. It aims to explain its function in a way that's accessible to both novice and experienced car owners.
I remember one time I was helping a friend move. We had his truck loaded to the brim, ready to go, and then... nothing. The truck just wouldn't start. Panic started to set in, but I remembered reading something about starter fuses. After a little digging (and a lot of sweating in the summer heat), we found the fuse box and, sure enough, the starter fuse was blown. A quick trip to the auto parts store and a new fuse later, the truck roared to life. It was such a relief and a great feeling of accomplishment! That experience really hammered home the importance of understanding basic automotive electrical systems.
The starter fuse is a critical component in your car's electrical system, specifically within the starting circuit. Its primary function is to protect the starter motor from excessive current. The starter motor requires a significant amount of amperage to turn the engine over, initiating the combustion process. If there's a surge in current due to a fault in the starter motor or related wiring, the fuse is designed to blow, interrupting the circuit and preventing damage to the starter and other electrical components. Think of it as a sacrificial lamb, protecting the more valuable parts of your car.
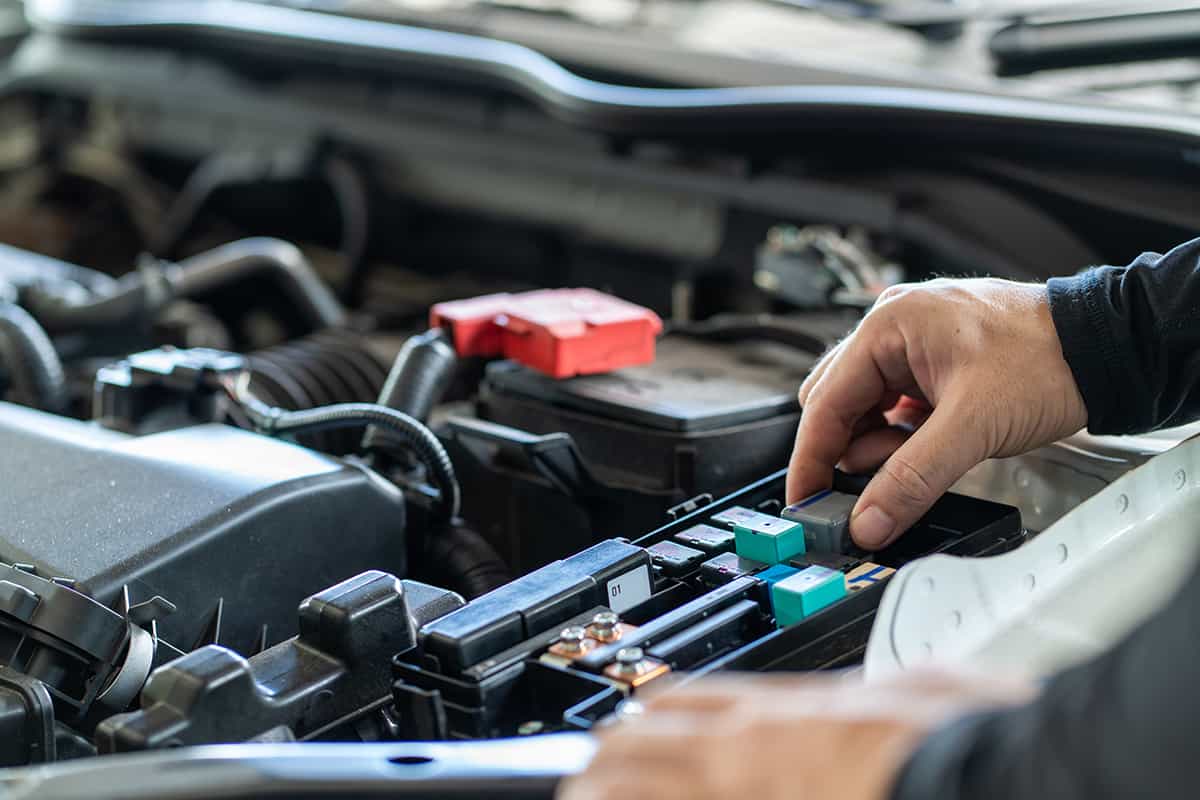
The starter fuse is typically located in the main fuse box, which is usually found under the hood near the battery, or sometimes inside the cabin, often under the dashboard or in the glove compartment. Its amperage rating varies depending on the vehicle model and engine size, but it's crucial to replace it with a fuse of the exact same rating to ensure proper protection. Using a fuse with a higher amperage rating can bypass the safety mechanism and potentially cause serious damage to the starter motor or wiring, while a lower rating fuse will likely blow prematurely, leaving you stranded.
Identifying a Blown Starter Fuse
This section aims to equip readers with the knowledge and techniques necessary to accurately identify a blown starter fuse, enabling them to differentiate it from other potential starting problems.
Identifying a blown fuse isn't always as straightforward as it seems. Sometimes, it's visually obvious – the filament inside the fuse is clearly broken. But other times, the damage is more subtle. That's where a little bit of detective work comes in. You can start by visually inspecting the fuse. Look for a break in the thin wire inside the fuse. If it's difficult to see, try holding the fuse up to the light. If you're still unsure, the best way to confirm a blown fuse is with a multimeter. A multimeter is an inexpensive tool that can measure the continuity of a circuit. Simply set the multimeter to the continuity setting (usually indicated by a sound wave symbol) and touch the probes to each end of the fuse. If the multimeter doesn't beep or show a reading, the fuse is blown.
A blown starter fuse is usually identifiable through a visual inspection or by using a multimeter. Visually, a blown fuse often exhibits a broken filament or a dark, burnt appearance inside the fuse window. However, sometimes the damage is not visible, making a multimeter essential for accurate diagnosis. To use a multimeter, set it to the continuity setting (often depicted by a diode symbol or a sound wave). Touch the probes to each of the fuse's terminals. If the multimeter displays continuity (typically a beep or a reading close to zero ohms), the fuse is intact. If there's no continuity, the fuse is blown and needs replacement.
Other indicators of a blown starter fuse can include a complete lack of response when you turn the ignition key, even with a fully charged battery. However, it's crucial to differentiate this from other potential issues like a dead battery, a faulty starter relay, or a problem with the ignition switch. Before assuming a blown fuse, check the battery voltage with a multimeter to ensure it's within the normal range (around 12.6 volts). If the battery is good, and you still have no response when trying to start the car, then investigating the starter fuse is the next logical step.
The History and Mythology of Automotive Fuses
The goal here is to provide a brief historical overview of automotive fuses, exploring their origins and the evolution of their design and function over time. This section also aims to debunk common myths surrounding fuses and their replacement.
Believe it or not, the concept of a fuse isn't some modern invention. It's been around for over a century! The earliest fuses were quite crude, but they served the same basic purpose: to protect electrical circuits from overcurrent. As cars became more complex, so did their electrical systems, and fuses evolved along with them. From the old glass tube fuses to the blade-type fuses we use today, each generation has been more reliable and easier to use.
The history of automotive fuses is intertwined with the development of the automobile itself. As cars evolved from simple mechanical devices to complex machines with sophisticated electrical systems, the need for circuit protection became paramount. Early automobiles used simple wiring systems, and the risk of short circuits and electrical fires was significant. The first fuses were rudimentary devices, often consisting of a piece of lead wire enclosed in a glass tube. These fuses were unreliable and prone to failure, but they were a necessary safeguard against electrical damage.
Over time, fuse technology improved significantly. The introduction of blade-type fuses, also known as spade fuses, marked a major advancement. These fuses are more compact, reliable, and easier to replace than their predecessors. They also feature a color-coding system that indicates their amperage rating, making it easier to select the correct replacement fuse. Despite these advancements, some myths surrounding fuses persist. One common myth is that replacing a blown fuse with one of a higher amperage rating will solve the problem. This is a dangerous practice that can overload the circuit and cause serious damage, including electrical fires. Always replace a blown fuse with one of the exact same amperage rating.
Unveiling the Hidden Secrets of Fuses
This section aims to delve into the more technical aspects of automotive fuses, exploring their internal construction, the materials used, and the factors that contribute to their performance and reliability. The goal is to reveal the hidden complexities of these seemingly simple devices.
There's more to a fuse than just a piece of wire inside a plastic housing. The materials used, the manufacturing process, and even the shape of the fuse element all play a crucial role in how well it performs. Did you know that some fuses are designed to react faster than others? This is important because different circuits require different levels of protection. A circuit that powers sensitive electronics needs a fast-acting fuse, while a circuit that powers a motor can tolerate a slightly slower response time.
The internal construction of an automotive fuse is more sophisticated than it appears. The fuse element, typically made of a thin strip of metal such as zinc, copper, or silver, is carefully designed to melt at a specific current level. The shape and dimensions of the element, as well as the type of metal used, determine the fuse's amperage rating and its response time. Fast-acting fuses, designed to protect sensitive electronic components, have a thinner element that melts quickly in response to an overcurrent condition. Slow-blow fuses, used for circuits that experience temporary current surges, have a thicker element that can withstand brief overloads without blowing.
The materials used in fuse construction also play a critical role in their performance. The fuse element must be made of a material with a consistent and predictable melting point. The housing material must be durable and resistant to heat and chemicals. The contacts, which connect the fuse to the circuit, must be made of a conductive material that resists corrosion. Understanding these hidden aspects of fuse design can help you appreciate the importance of using high-quality fuses from reputable manufacturers. Cheap, poorly made fuses may not provide adequate protection and could even fail prematurely, leaving your car vulnerable to electrical damage.
Recommendations for Fuse Selection and Maintenance
The objective of this section is to provide practical recommendations for selecting the right replacement fuses for your vehicle and for implementing preventative maintenance practices to minimize the risk of blown fuses in the future.
When it comes to fuses, it's not a place to cut corners. Always use high-quality fuses from a reputable brand. They might cost a little more, but they're worth it for the peace of mind they provide. And remember, always replace a blown fuse with one of the exact same amperage rating. Using a fuse with a higher rating can be dangerous and could lead to serious electrical damage.
Selecting the right replacement fuse is crucial for ensuring proper circuit protection. Always consult your vehicle's owner's manual or a fuse box diagram to determine the correct amperage rating for the starter fuse and other fuses in your car. Using a fuse with a higher amperage rating than specified can overload the circuit and cause damage to the wiring or components. Using a fuse with a lower amperage rating will likely result in premature fuse failure, leaving you stranded.
Preventative maintenance can also help minimize the risk of blown fuses. Regularly inspect your car's wiring for signs of damage, such as frayed insulation or loose connections. Address any potential problems promptly to prevent short circuits and overcurrent conditions. Consider using a dielectric grease on fuse contacts to prevent corrosion and ensure a good electrical connection. Finally, keep a spare set of fuses in your car so you're prepared for unexpected fuse failures. By following these recommendations, you can keep your car's electrical system running smoothly and reliably.
Troubleshooting Persistent Fuse Problems
This section delves into the process of identifying and addressing underlying issues that may be causing repeated starter fuse failures, going beyond simply replacing the fuse.
If your starter fuse keeps blowing, it's a sign that something is wrong with the starting circuit. It could be a short circuit in the wiring, a faulty starter motor, or a problem with the starter relay. Don't just keep replacing the fuse – you need to find and fix the underlying problem. A multimeter can be your best friend here. Use it to check the wiring for shorts and to test the starter motor and relay.
Persistent starter fuse failures indicate an underlying problem that needs to be addressed. Simply replacing the fuse repeatedly is not a solution and can potentially lead to more serious damage. The most common causes of repeated fuse failures include short circuits in the wiring, a faulty starter motor, or a problem with the starter relay. A short circuit occurs when a wire with exposed insulation comes into contact with the vehicle's chassis or another metal component, creating a low-resistance path for current to flow. This can cause a surge of current that blows the fuse.
A faulty starter motor can also draw excessive current, leading to fuse failure. This can be caused by worn-out brushes, damaged windings, or a mechanical problem within the motor. The starter relay, which controls the flow of current to the starter motor, can also malfunction and cause the fuse to blow. To troubleshoot persistent fuse problems, start by visually inspecting the wiring for any signs of damage or wear. Use a multimeter to check for continuity between the wires and the chassis, indicating a short circuit. Test the starter motor and relay to ensure they are functioning properly. If you're not comfortable performing these tests yourself, consult a qualified mechanic.
Essential Tips for Safe Fuse Replacement
This section focuses on providing practical safety guidelines for replacing automotive fuses, emphasizing the importance of disconnecting the battery and using appropriate tools.
Safety first! Before you start working on your car's electrical system, always disconnect the negative battery terminal. This will prevent any accidental short circuits and protect you from electrical shock. And make sure you're using the right tools for the job. A fuse puller is a handy little tool that makes it easy to remove fuses without damaging them.
Replacing automotive fuses is a relatively simple task, but it's important to follow proper safety precautions to avoid injury or damage to your vehicle. The most important safety tip is to disconnect the negative battery terminal before working on any part of the electrical system. This will prevent accidental short circuits and protect you from electrical shock. Use a wrench to loosen the nut on the negative battery terminal and carefully remove the cable. Make sure the cable is not touching any metal parts of the car.
When removing and replacing fuses, use a fuse puller whenever possible. This small plastic tool is designed to grip the fuse securely and prevent you from dropping it or damaging the fuse box. If you don't have a fuse puller, you can use a pair of needle-nose pliers, but be careful not to squeeze the fuse too hard, as this can damage it. Always replace a blown fuse with one of the exact same amperage rating. Using a fuse with a higher rating can overload the circuit and cause serious damage, including electrical fires. If you're not sure what amperage rating to use, consult your vehicle's owner's manual or a fuse box diagram.
Understanding Fuse Box Diagrams
This section provides a detailed explanation of how to interpret fuse box diagrams, enabling readers to easily identify the location and function of different fuses within their vehicle.
Fuse box diagrams can look intimidating at first, but they're actually quite simple to understand. They're basically a map of your car's electrical system, showing you where each fuse is located and what it protects. The diagram will usually be located on the inside of the fuse box cover. Take a few minutes to study it, and you'll be able to quickly find the fuse you're looking for.
Fuse box diagrams are essential tools for identifying the location and function of different fuses within your vehicle. These diagrams are typically found on the inside of the fuse box cover or in your vehicle's owner's manual. Understanding how to interpret these diagrams can save you time and frustration when troubleshooting electrical problems.
The diagram will usually show a layout of the fuse box, with each fuse represented by a small rectangle or square. Each fuse will be labeled with a number or letter, and the diagram will include a legend that explains the function of each fuse. For example, the legend might indicate that fuse number 10 is the starter fuse, fuse number 15 is the headlight fuse, and so on. Some diagrams may also include the amperage rating of each fuse. When using a fuse box diagram, it's important to note the orientation of the diagram relative to the actual fuse box. The diagram may be oriented horizontally or vertically, and it's important to match the orientation of the diagram to the layout of the fuse box in your car.
Fun Facts About Automotive Fuses
This section aims to entertain and educate readers with interesting and little-known facts about automotive fuses, highlighting their importance in the evolution of vehicle technology.
Did you know that the first automotive fuses were made of lead? Or that the color-coding system for fuses wasn't standardized until the 1970s? Fuses might seem like a mundane topic, but they're actually a fascinating part of automotive history!
Automotive fuses are often overlooked, but they play a crucial role in protecting your vehicle's electrical system. Here are some fun facts about these unsung heroes: The first automotive fuses were made of lead wire encased in glass tubes. These early fuses were unreliable and prone to failure, but they were a necessary safeguard against electrical fires. The color-coding system for fuses, which indicates their amperage rating, wasn't standardized until the 1970s. Before that, fuse manufacturers used different colors and markings, making it difficult to select the correct replacement fuse. The smallest automotive fuse is called a micro fuse. These tiny fuses are used in modern vehicles to protect sensitive electronic components. Some high-performance cars use special fuses made of silver or gold. These fuses offer superior conductivity and can handle higher current loads. Automotive fuses are not just used in cars. They are also used in trucks, motorcycles, boats, and other vehicles with electrical systems.
The fuse is an important safety component that often gets overlooked. They are small, inexpensive, and designed to protect the vehicle and its occupants from electrical fires, so remember to keep your car safe.
Step-by-Step Guide to Replacing a Blown Starter Fuse
This section provides a clear and concise step-by-step guide to replacing a blown starter fuse, ensuring that readers can confidently perform the task themselves.
Okay, let's get down to business. Here's how to replace a blown starter fuse: First, locate the fuse box. Consult your owner's manual if you're not sure where it is. Then, use the fuse box diagram to identify the starter fuse. Use a fuse puller or needle-nose pliers to remove the blown fuse. Make sure you replace it with a fuse of the exact same amperage rating. Finally, reconnect the negative battery terminal and test to see if your car starts.
Replacing a blown starter fuse is a relatively simple task that most car owners can perform themselves. Here's a step-by-step guide: Gather your tools and supplies. You'll need a fuse puller or needle-nose pliers, a replacement fuse of the correct amperage rating, and your vehicle's owner's manual or a fuse box diagram. Locate the fuse box. Consult your owner's manual if you're not sure where it is. The fuse box is usually located under the hood near the battery, or sometimes inside the cabin, often under the dashboard or in the glove compartment. Identify the starter fuse. Use the fuse box diagram to locate the fuse labeled "starter" or ignition.The diagram will also indicate the amperage rating of the fuse.
Remove the blown fuse. Use a fuse puller or needle-nose pliers to gently pull the fuse out of the fuse box. Inspect the fuse to confirm that it is blown. A blown fuse will typically have a broken filament or a dark, burnt appearance. Install the replacement fuse. Make sure the replacement fuse has the same amperage rating as the blown fuse. Gently push the replacement fuse into the fuse box until it is fully seated. Test the repair. Reconnect the negative battery terminal and try starting the car. If the car starts, the problem is solved. If the fuse blows again immediately, there is a more serious problem with the starting circuit that needs to be addressed by a qualified mechanic.
What If the Fuse Keeps Blowing?
This section addresses the situation where a newly replaced starter fuse blows immediately or repeatedly, exploring potential causes and offering guidance on further troubleshooting steps.
So, you've replaced the fuse, but it keeps blowing? This is a sign that there's a more serious problem lurking in your car's electrical system. It could be a short circuit, a faulty starter motor, or a problem with the wiring. Don't keep replacing the fuse – you need to find and fix the underlying problem.
If the starter fuse blows immediately or repeatedly after replacement, it indicates a persistent problem in the starting circuit. This is a sign that there is an underlying issue causing excessive current draw, and simply replacing the fuse will not solve the problem. The most common causes of repeated fuse failures include short circuits in the wiring, a faulty starter motor, or a problem with the starter relay. A short circuit occurs when a wire with damaged insulation comes into contact with the vehicle's chassis or another metal component, creating a low-resistance path for current to flow. This can cause a surge of current that blows the fuse.
A faulty starter motor can also draw excessive current, leading to fuse failure. This can be caused by worn-out brushes, damaged windings, or a mechanical problem within the motor. The starter relay, which controls the flow of current to the starter motor, can also malfunction and cause the fuse to blow. To troubleshoot persistent fuse problems, start by visually inspecting the wiring for any signs of damage or wear. Use a multimeter to check for continuity between the wires and the chassis, indicating a short circuit. Test the starter motor and relay to ensure they are functioning properly. If you're not comfortable performing these tests yourself, consult a qualified mechanic.
Top 5 Reasons a Starter Fuse Might Blow
This section presents a listicle highlighting the five most common reasons why a starter fuse might blow, providing readers with a quick and easy reference for troubleshooting.
Let's break down the most common reasons why your starter fuse might be giving you trouble: 1. Short circuit in the wiring.
2. Faulty starter motor.
3. Problem with the starter relay.
4. Overloaded circuit.
5. Age and wear.
Here are the top 5 reasons why a starter fuse might blow: Short circuit in the wiring: Damaged or frayed wiring can create a short circuit, causing excessive current to flow through the fuse and blow it. Faulty starter motor: A worn-out or damaged starter motor can draw excessive current, overloading the fuse and causing it to blow. Problem with the starter relay: A malfunctioning starter relay can cause the starter motor to engage improperly, drawing excessive current and blowing the fuse. Overloaded circuit: Adding too many electrical accessories to the starting circuit can overload the fuse and cause it to blow. Age and wear: Over time, fuses can degrade and become more susceptible to blowing, even under normal operating conditions.
By understanding these common causes of starter fuse failures, you can more effectively troubleshoot electrical problems in your car and prevent future fuse failures.
Question and Answer
Q: How do I know if my starter fuse is blown?
A: The easiest way to tell if your starter fuse is blown is to visually inspect it. Look for a break in the thin wire inside the fuse. If it's difficult to see, try holding the fuse up to the light. You can also use a multimeter to test the fuse for continuity. If the multimeter doesn't beep or show a reading, the fuse is blown.
Q: Where is the starter fuse located?
A: The starter fuse is typically located in the main fuse box, which is usually found under the hood near the battery, or sometimes inside the cabin, often under the dashboard or in the glove compartment. Consult your vehicle's owner's manual for the exact location of the fuse box and the starter fuse.
Q: What amperage rating should my replacement starter fuse have?
A: Always replace a blown starter fuse with one of the exact same amperage rating. Using a fuse with a higher amperage rating can bypass the safety mechanism and potentially cause serious damage to the starter motor or wiring, while a lower rating fuse will likely blow prematurely, leaving you stranded. Consult your vehicle's owner's manual or a fuse box diagram to determine the correct amperage rating for the starter fuse.
Q: What should I do if my starter fuse keeps blowing?
A: If your starter fuse keeps blowing, it's a sign that there's a more serious problem in your car's electrical system. It could be a short circuit, a faulty starter motor, or a problem with the wiring. Don't keep replacing the fuse – you need to find and fix the underlying problem. Consult a qualified mechanic to diagnose and repair the issue.
Conclusion of Blown Starter Fuse: Identifying and Replacing It
Replacing a blown starter fuse is a manageable task that can save you time and money. By understanding the function of the starter fuse, knowing how to identify a blown fuse, and following the step-by-step instructions outlined in this guide, you can confidently tackle this common automotive problem. Remember to prioritize safety, use the correct replacement fuse, and consult a professional if you encounter persistent issues. With a little knowledge and the right tools, you can keep your car running smoothly.